Friday, May 3, 2024

Spellbinders | Glimmering Flowers Collection - Part 1


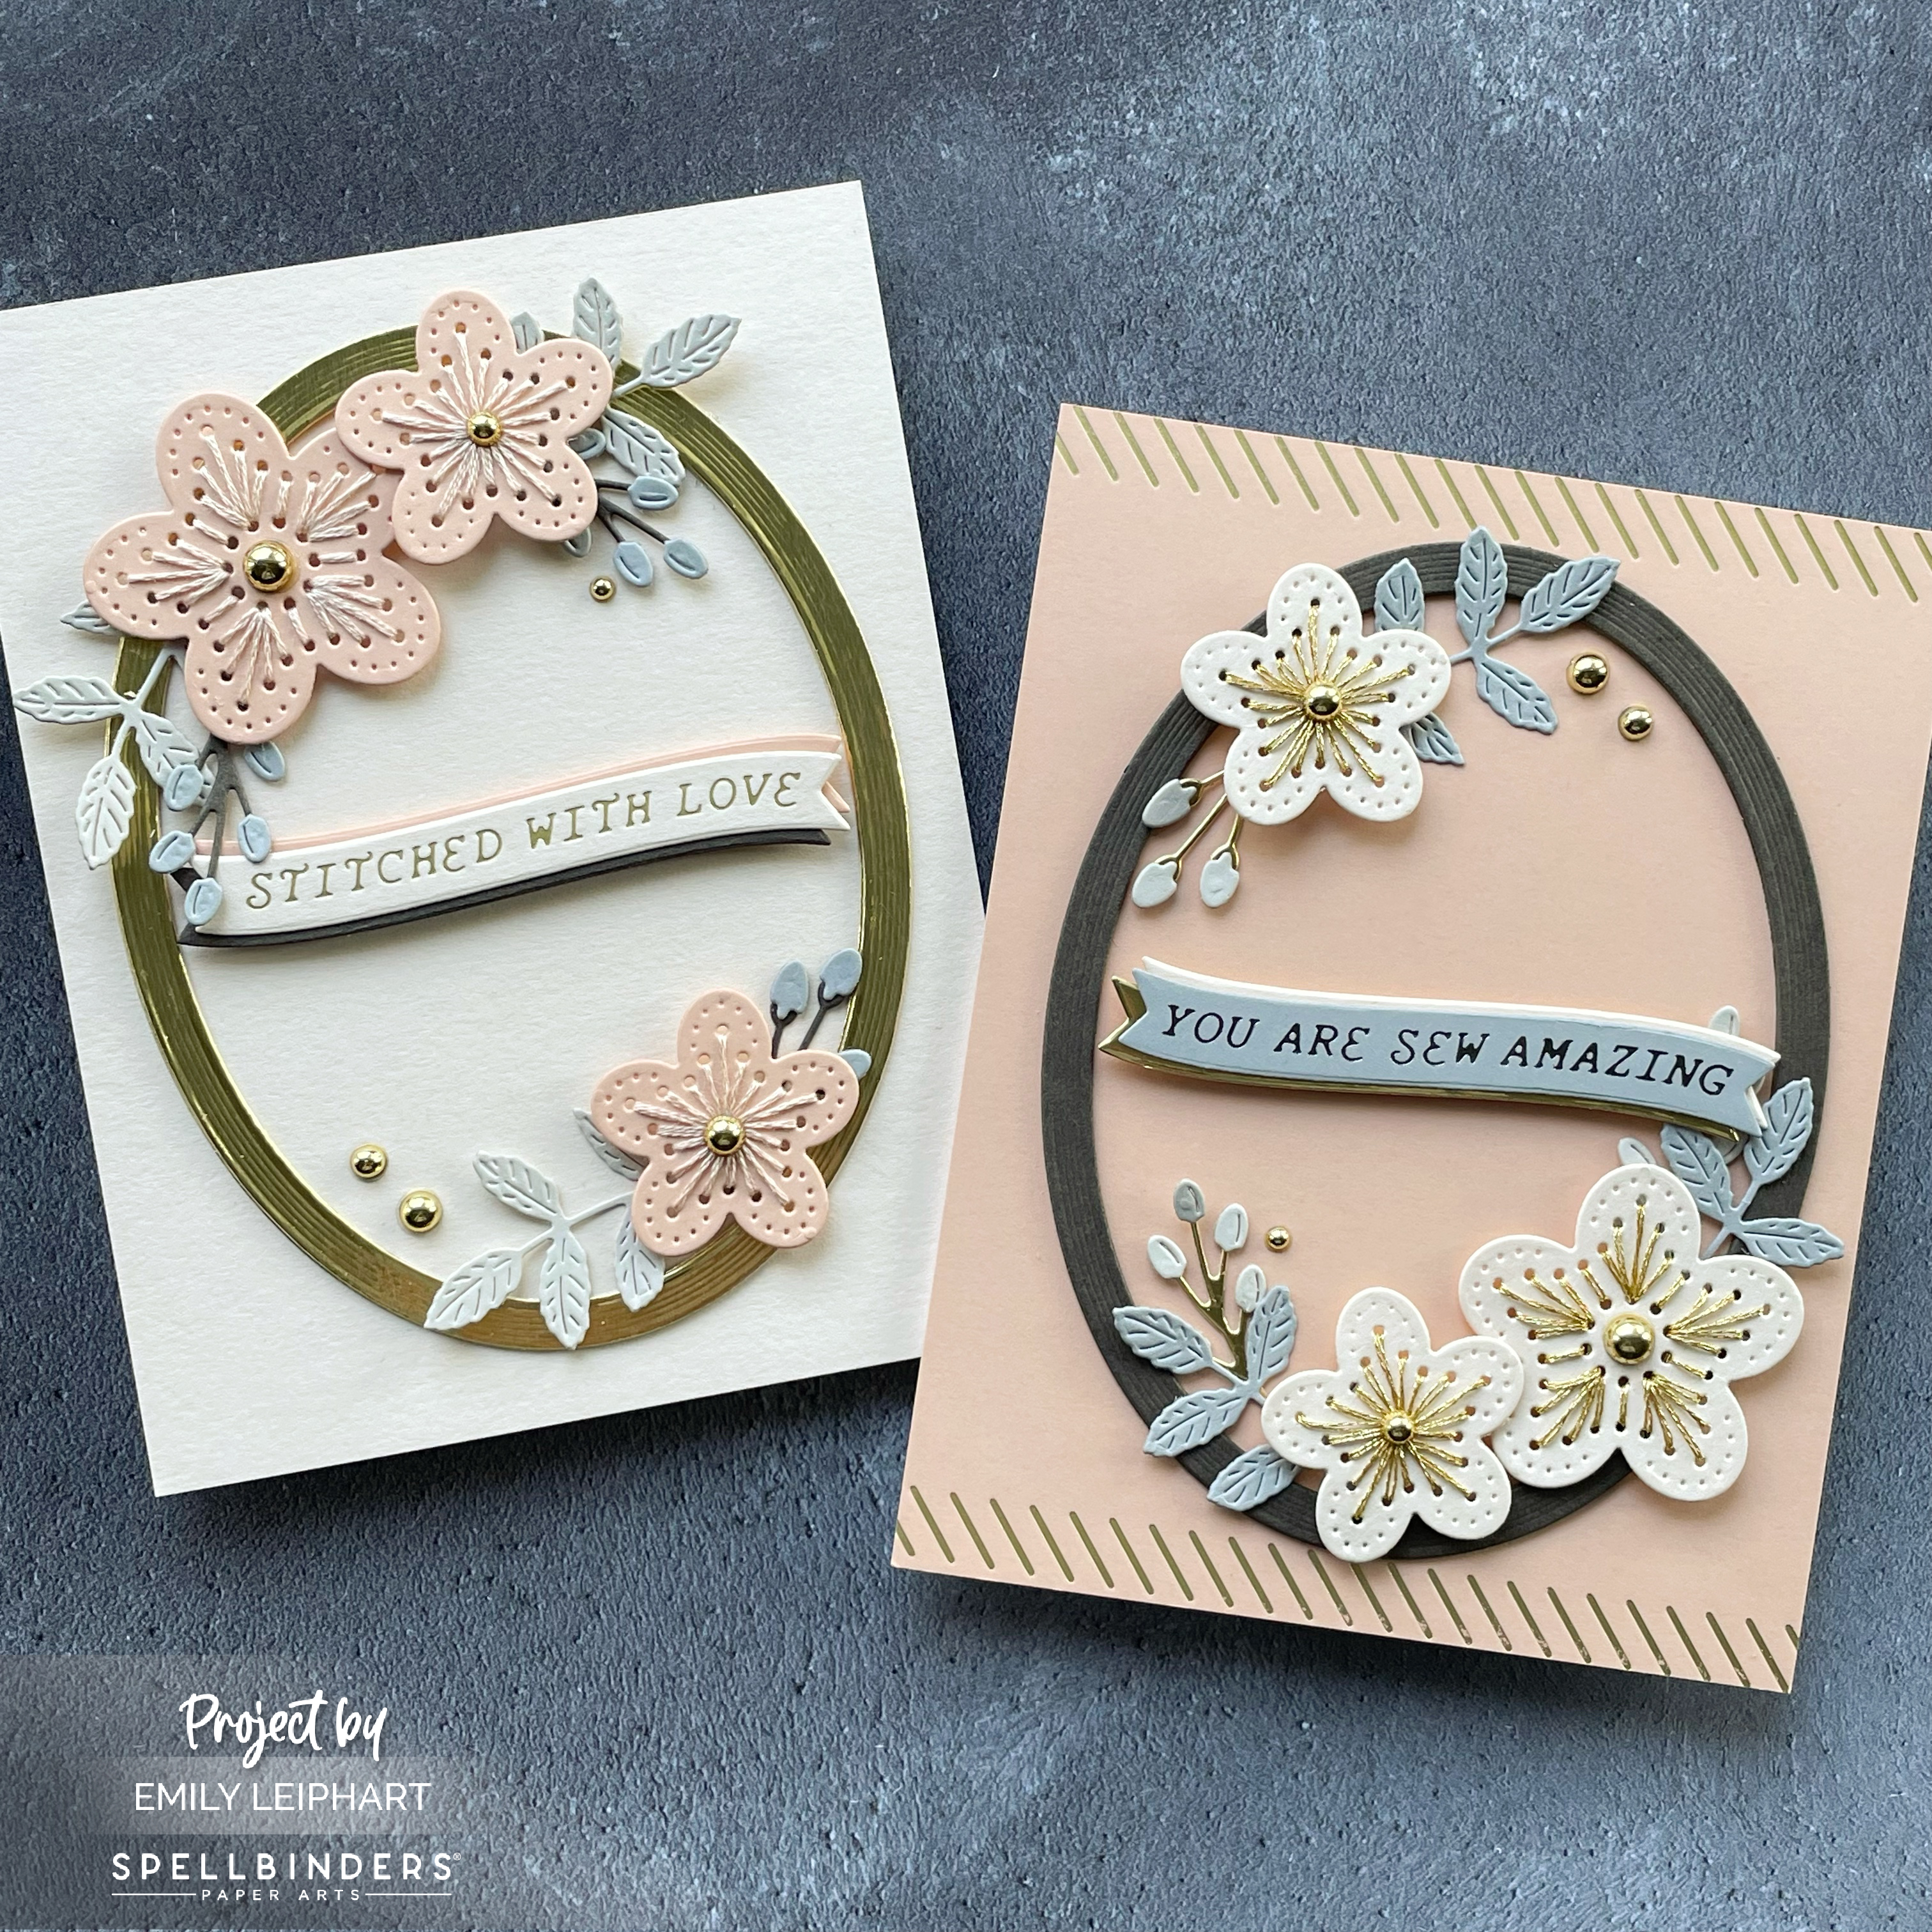
Hello, crafty friends! I'm so excited to be creating with the Spellbinders Glimmering Flowers Collection. It's so beautiful and easy to use with hot foil plates and coordinating stencils. You'll definitely want every piece in this collection! I used the same colour palette to create contrasting cards for this post and you'll definitely see more from me using other products in this collection.


Both my cards feature the Glimmering Buttercups Glimmer Plate but this first card also features the Layered Glimmering Buttercups Stencils which are only available as part of the Glimmering Buttercups Glimmer and Stencil Bundle.


I heat foiled the Glimmering Buttercups on white cardstock with Aura Hot Foil and I love the way it shimmers and glows in the light. I chose four inks to stencil in the buttercups and they are Be MineCotton CandyGlitz and Sprinkles. I layered a bit of Glitz over Sprinkles on the small leaves for a slight green tint.


After stencilling, I used the largest of the Precision Layering A2 A dies to cut the panel and attached it to a white linen card base. Next, I heat foiled all of the Curved Everyday Sentiments with Aura Hot Foil on Pitch Black cardstock.


After layering the sentiment banner with Sweet Pea and Surf Blue cardstock, I popped it on foam strips and added some Fashion Topaz Pearl Dots to finish the card.


This second card is a dramatic contrast to the first design. I wanted to show off the beautiful details on the Glimmering Buttercups Glimmer Plate and this was easy to do with Bright Pink Hot Foil on Pitch Black cardstock.


No stencil was necessary here but if you wanted to add something, distress oxide inks would work wonderfully to highlight the buttercups a bit.


Once again, I cut the panel using the Precision Layering A2 A dies and attached it to a white linen card base. Next, I heat foiled all of the Curved Everyday Sentiments with Aura Hot Foil on white cardstock.


I cut extra sentiment banners with Mirror Gold cardstock and popped it to the foiled panel with foam strips, tucking a teal double bow underneath.


I'd love to know if you prefer the soft, colourful design or the bold, dramatic design! I appreciate you stopping by and, if you're inspired, please shop my affiliate links below. Spellbinders would love to know that you were inspired by me.

Thanks so much for your continued support!

Supplies

Wednesday, May 1, 2024

Lunar New Year Challenge + Giveaways | May 2024


The Lunar New Year Challenge is back and since we've partnered up with your favourite craft companies all year long, that means there are giveaways every month! This month, we're giving away ONE $25 gift certificate to Simon Says Stamp, ONE $25 gift certificate to Lawn Fawn, ONE $25 gift certificate to My Favorite Things, and ONE $25 gift certificate to Catherine Pooler. That's a total of $100 in giveaways in May!


I haven't had a lot of time to craft these last few weeks but, luckily, I still had the leftovers from the February Challenge sitting in a pile on my desk. I had assembled several of Catherine Pooler's Circle Landscape dies using all the pieces I had die cut back then so this was relatively easy to throw together at the last minute.


The colours featured here are Cupcake, Cherry Pop, Mulled Wine, Matte Metallic Gold and Glitter Gold cardstock. The card base was cut from Mulled Wine to coordinate with the top and bottom pieces in the circle.


The Cupcake panel was cut with Taylored Expressions' Rays Pierce & Cut Plate. Before attaching the circle to the front panel, I die cut the Lucky Word Die from Black Glitter Foam and cut off the y. After gauging the position of the die cut word, I stamped two words from Lantern Festival to complete the sentiment.


I glued the Rays Pierce & Cut panel to the card base, then I attached the assembled Circle Landscape close to the top of the panel. After glueing the die cut Lucky Word to the circle, I die cut small hearts from the Hearts-n-Tags Dies in CupcakeCherry PopMulled Wine. I stacked the hearts three high and glued them to the circle.


The rules are simple. You must create a new Lunar New Year, Chinese New Year or a 2024 Dragon Birthday card and add the link to your post in the link-up party. For the month of May, we are opening up the possibilities and invite you to make cards for Mother's Day, mother figures and other inspirational women in your life. If you're a Game of Thrones fan, think Mother of Dragons! Multiple entries are allowed. Backlinking to an older project is strictly prohibited.

Our May Lunar New Year Challenge will run from 12:00am EST on May 1, 2024 through 12:00pm EST on May 31, 2024. We would love to see you using products from our four generous sponsors! The four lucky winners will be randomly selected from all eligible entries and announced at the start of the June Challenge. 

(save and share with your project)

Visit the May Link-Up Party post HERE to see all of the design team projects and be inspired to create your own! When sharing your challenge entries on social media, feel free to save this badge and post it along with your project. Please tag us @lunarnewyearchallenge on Instagram and use the hashtag #lunarnewyearchallenge so everyone can find and be inspired by all your amazing projects.

Thanks so much for stopping by and I'll see you again soon!

Supplies:

Saturday, April 27, 2024

Spellbinders | April 2024 Monthly Club Kits


Crafty friends, I've missed you! I'm squeaking in to share the April 2024 Monthly Club Kits from Spellbinders. Both cards feature both the "Stitched Wall Hanging" Stitching Die of the Month and the "Sew Amazing" Glimmer Hot Foil Kit of the Month. Club Kits close on the 27th of each month so get them while you can!


I used the same colours on both cards, rotating the colours of the different elements and different concentrations on each card for different looks. The colour palette I used includes Peach Sorbet, Barely Peach, Dove, Pebble, Mocha and Mirror Gold cardstock was also added as an accent on both cards.


I used the embroidery hoop without the hanging hook so it would be a regular frame and not affect its placement on the cards. I love the embossed line detail on the frame, which shows up so nicely on the Mirror Gold cardstock.


The card base was cut from Barely Peach cardstock. The flowers were cut from Peach Sorbet and stitched with Very Light Desert Sand 3774. The textured leaves were cut from Pebble cardstock, the stems and buds were cut from Mocha and Dove cardstock.


The sentiment from the "Sew Amazing" Glimmer Hot Foil Kit of the Month was heat foiled with Matte Gold Hot Foil on Barely Peach cardstock. I layered extra banners in Mocha and Barely Peach cardstock to tie in colours from the flowers and foliage.


The frames on both cards were layered three high and all the foliage were glued flat to the card base. The stitched flowers were popped up with foam squares and I added gold pearl embellishments to finish.


This second card flips the position of the stitched flowers, which are cut from Barely Peach cardstock and stitched with gold metallic thread. The card base was cut from Peach Sorbet and heat foiled with one of the stitching dies from the "Sew Amazing" Glimmer Hot Foil Kit of the Month.


The sentiment for this card was heat foiled using Pewter Hot Foil on Dove cardstock and layered on Mirror Gold and Barely Peach cardstock.


This time, the detailed leaves were die cut from Dove cardstock and the twigs and buds were cut from Mirror Gold and Pebble cardstock.


Just like the first card, the dimensional elements are in the layered frame and use of foam squares. I just love all the different gold details on this one. Which card is your favourite?


Here's a list of monthly club kits I share, as well as some of the value kits offered by Spellbinders:


I appreciate you stopping by and, if you're inspired, please shop my affiliate links below. Spellbinders would love to know that you were inspired by me. Thanks so much for your continued support!

Supplies